How to Restore the Broken Terracotta Army Statues?
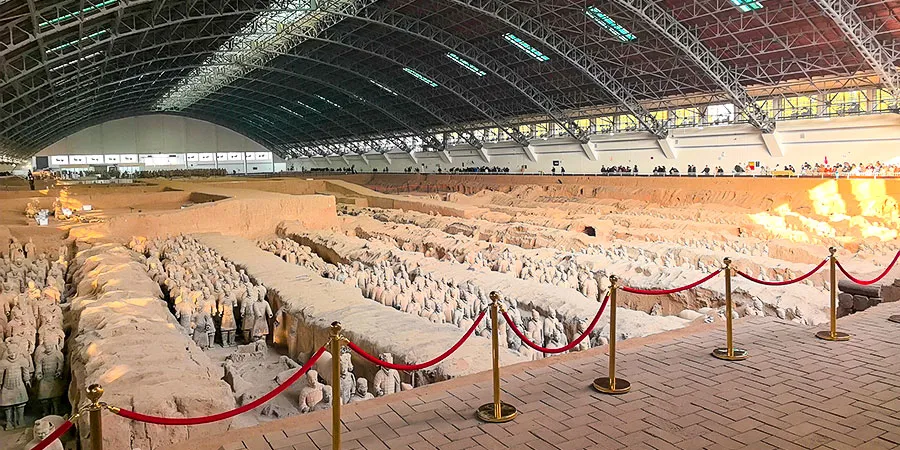
When you stand before the massive pits at the Terracotta Warriors and Horses Museum in Xi'an, you can't help but be amazed by the grand, imposing army of terracotta soldiers. Yet it's hard to imagine that when archaeologists first discovered them over 50 years ago, most lay in pieces - some toppled over, others crushed into fragments, and many still buried underground. The over one thousand intact warriors you see today were pieced back together, fragment by fragment, through months or even years of painstaking work, an archaeological surgery that is extremely complex and delicate. So far, only a small portion of the discovered terracotta figures has been restored. Then, how are these 2,000-year-old patients treated? The whole process can be divided into three main stages.
Stage 1. Before Restoration - A Rigorous Consultation
Before any restoration work begins, a series of careful preparations must be made. Think of it like going to a hospital: you cannot have surgery directly, you need registration, diagnosis, and examinations.
Step 1: Extracting and Registering
Conservators carefully lift every fragment from the archaeological site and transport them to the restoration lab. Each piece, no matter how tiny, is given a unique number. This is like registering at a hospital and creating a medical record, ensuring the fragment's origin and location are accurately documented.
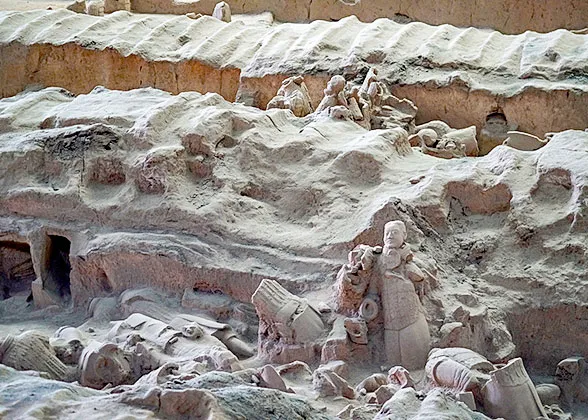
Fragments of Figures at the Excavation Site
Conservators Recording the On-site Information
Step 2: Checking Up in Detail
Next, each fragment undergoes a full physical examination. Conservators record its condition, including the number of pieces, damage level, remaining paint, and so on. At the same time, a disease survey is conducted. According to studies, the terracotta warriors suffer from up to 18 types of harmful conditions, including crystalized salts on the surface and microbial growth. For a more detailed check, they use various scientific tools: X-rays to see internal structures, microscopes to analyze the paint components, just like a patient getting a CT scan.
Step 3: Making the Surgical Plan
Once all the check-up reports are ready, a team of experts holds a group consultation. Based on the cultural relic's condition and conservation principles, they carefully deliberate and finally tailor a detailed restoration plan.
Stage 2: Core Restoration - Six Main Procedures
This stage is the heart of the restoration process, which is equivalent to a delicate operation for patients.
Step 4: Cleaning the "Diseases"
Conservators first remove diseases from the surface of the terracotta fragments, mainly including dirt and hard encrustations. Why? Only by removing these can the original appearance be restored, allowing the cultural relics to survive more safely and stably in a controlled environment. During this process, conservators need to remove as little as possible, preserve as much original information as they can. If it doesn't need cleaning, leave it alone. This step demands great patience and skill, and the tools are quite special: a set of fine surgical-style instruments. As for the cleaning methods, physical cleaning is the main approach, suitable for most issues; chemical cleaning is used only for certain pollutants and some biological contaminants. For a single armored terracotta warrior broken into over 50 fragments, a team of a dozen people may need two to three months just for cleaning.
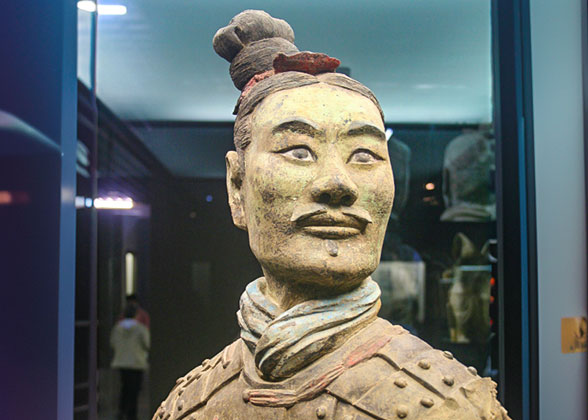
Step 5: Reinforcing the Paint Layers
The warriors were originally painted all over, but after two thousand years, the paint layers tend to curl and flake off after excavation. This is one of the greatest challenges in restoration. For fragments with well-preserved paints unearthed, conservators apply emergency reinforcement right at the site. After transferring them to the lab, a second or even multiple reinforcements will be performed. When the paints adhere to soil and cannot be directly peeled off, the ''re-attachment method'' is used: a fine mesh is placed beneath the paint layer to support it, and the paints are reverse-adhered onto the mesh. The mesh is then trimmed to match the shape of the terracotta fragment, and the overlying soil is carefully cleaned away. Finally, the intact paint layer is removed from the mesh and precisely re-attached to its original position. After re-attachment, daily moisturizing and reinforcement continue until the paints stabilize.
After cleaning, traces of production become visible: decorative patterns on the figures, craftsmen's fingerprints, even their names. These are valuable clues for studying Qin Dynasty (221 - 207 BC) handicrafts. To preserve them systematically, conservators use cameras, microscopes, or traditional rubbings to record these 2,000-year-old technological secrets one by one.
Step 7: Piecing Together the Fragments
This step tests eyesight and spatial imagination the most. Faced with hundreds of irregular fragments, the conservator works like a 3D jigsaw puzzle, matching countless pieces by shape, color, thickness, grain, and the contours of broken edges. Constant trial and adjustment are needed to find the perfect fit and a deviation of just 0.1 millimeters (3.9 mils) is not allowed. The purpose is to restore the original posture and structural integrity of the warrior, ensuring that later adhesion will be accurate and stable. A movable restoration table, like a hospital bed, is used to hold the fragments for easier handling.
Step 8: Adhering the Fragments Together
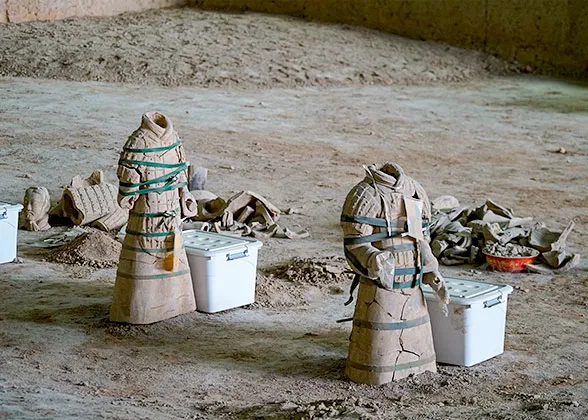
Once the pieces are correctly matched, adhesion, similar to surgical suturing, will begin. The gluing order is very specific: for a warrior, from bottom to top - base plate, feet, legs, body, and then head. For a terracotta horse, start with the torso, then legs, and finally head. The adhesive is a reversible epoxy resin, meaning that if future technology improves, the work can be undone without causing permanent damage. After each gluing stage, the pieces are secured with straps or specialized tools. Once the adhesive fully cures, the straps are removed, excess glue is carefully scraped off, and the bond becomes smoother. At this point, the warrior is essentially whole again, though not all are completely intact.
Some warriors still have missing parts after adhesion. Rules about whether they should be filled are strict. To preserve authenticity, filling is generally not recommended. It is allowed only when the missing part affects structural stability or when clear archaeological evidence exists. For example, a symmetrical piece on the other side can serve as a reference. However, only partial filling can be done, and the filling material must be identifiable and achieve the effect that from a distance the color looks harmonious, but up close the filled area is slightly lower than the original surface.
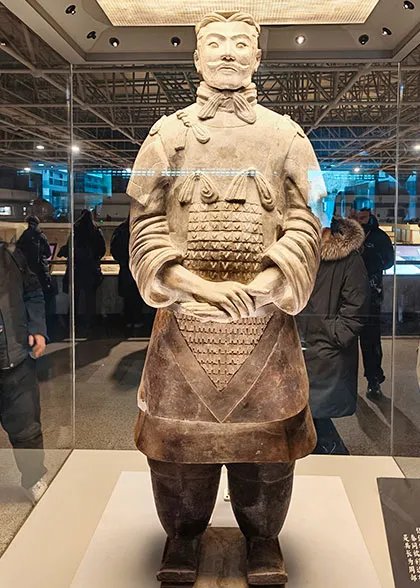
Restored High-ranking Officer
Stage 3: After Restoration - Settling the Cultural Relics
Once the warrior has stood up again, the restoration work is not over. Important finishing steps remain.
Step 10: Drawing Records
To facilitate careful observation, conservators create precise drawings of the restored warriors' current condition, disease patterns, tool marks, and so on. These drawings then become part of their permanent archive, providing essential references for future research and any necessary re-treatment.
Step 11: Observing the Restored Warriors
Freshly restored warriors are not immediately returned to the exhibition hall. They are kept in the restoration lab or on site for 1 to 6 months, like patients staying in hospital for observation after surgery. Conservators closely monitor whether the reinforced paint remains stable, whether the glued joints are secure, and ensure the piece fully adapts to its preservation environment. If any problem arises, it is promptly addressed and recorded.
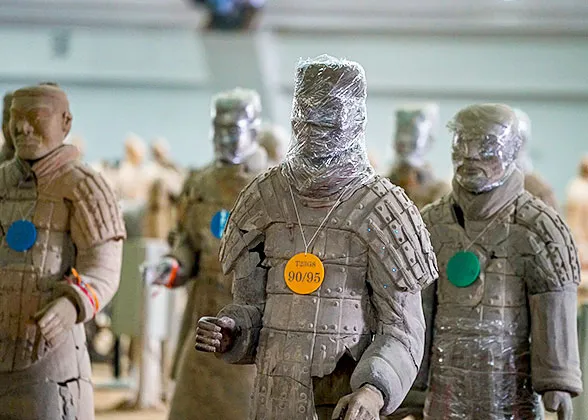
Step 12: Establishing an ID Card
The final step is to create a comprehensive conservation and restoration file for each warrior, containing all the information from excavation to completion: photographs, drawings, test data, materials used, personnel involved, and so on. Finally, the restored warriors are formally handed over by multiple departments and receive a unique collection registration number respectively, similar to a person's ID card. Only with this ID can it be displayed in the museum or even travel abroad to show the world the splendor of China two millennia ago.
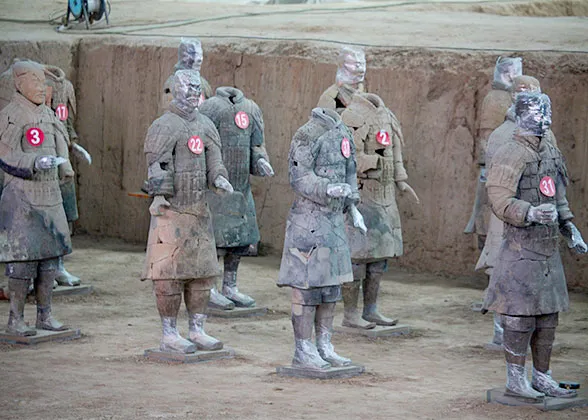
Figures with ID Numbers to Be Observed
Warriors Settled in Data Collection Area
Today, each restored terracotta warrior embodies a fusion of modern technology and traditional craftsmanship, as well as the unwavering dedication of conservators. With the efforts of archaeologists and conservators, more terracotta soldiers will be reborn from the fragments in the future, standing before us once again.
 See more about How did the Terracotta Army get burnt and destroyed?